Saturday, February 6, 2016

Making Raspberry Pi Web Controls

Easy Writer: Setup for Raspberry Pi PHP

source: http://www.php5dp.com/easy-writer-setup-for-raspberry-pi-php/

PHP Design Pattern

Easy Writer: Setup for Raspberry Pi PHP

RaspPHPFocus on writing PHP Code
In fiddling around with PHP on a Raspberry Pi running on a Debian Linux OS more or less directly from a terminal mode, I realized that the focus (in my case) was getting the Linux commands right and very little with actually writing PHP programs. Most queries about getting the setup right involved Linux system administration and not PHP programming.
This short post is for Raspberry Pi users (and perhaps Linux users in general), and it focuses on setting up your Raspberry Pi so that you can use default Raspberry Pi editors (LeafPad) and the File Manager to work with PHP programs. Once set up, you will find the process of creating server-side programs in PHP much easier with no need to use the  terminal editors after setting up your system.
Installing Apache and PHP
Because PHP is a server-side language, you will need both a server and PHP installed on your Raspberry Pi. Using the Root Terminal (Accessories → Root Terminal), enter the following line:
sudo apt-get install apache2 php5 libapache2-mod-php5
Press the Enter key and patiently wait until it’s completed the setup. Once done, you computer will have both a web server and PHP installed. To test whether installation was successful, open a browser from the main menu (Internet → NetSurf Web Browser) and enter the following:
  http://localhost/
If everything works, you will see the message shown in Figure 1 on the right:
Figure 1: Default Web Page
This location (http://localhost) is the root for your Web pages—PHP and any other Web page you decide to put on your Raspberry Pi Apache server. The name of the file is index.html. On your Raspberry Pi, in the Linux file system, the address is:
  /var/www/
Open the File Manager (Accessories → File Manager) and in the window where you see /home/pi enter /var/www. You will now be able to see the icon for the html file that was automatically created when you installed the Apache server.

Saving PHP and Other Web Files
Before you can start creating and saving PHP programs, you have to make one more adjustment to your file system using the Root Terminal editor. (Accessories → Root Terminal). Enter the following and press the Enter key at the end of each line:
sudo chown www-data:www-data /var/www
sudo chmod 775 /var/www
sudo usermod -a -G www-data pi
sudo reboot
Now you can write (save) files to the www directory and its subdirectories (folders).
PHP Programming Workflow on Raspberry Pi
Now, we’re all set to look at a fairly simple workflow using Raspberry Pi tools. Begin by opening the File Manager from the Pi home:
Figure 2: Pi Home Directory

Navigate to /var/www. You will see the index.html file. Select from the top menu, File →  Create New… →  Folder and name the new folder “php.” This will be the directory where you place your PHP files and PHP-related subdirectories and files. Figure 3 shows how your File Manager will now look with your new php directory/folder.
Figure 3: PHP folder in www root.

At this point, you’re all set to start working with server-side PHP. To get started, open the php folder by double-clicking it. Next open Leafpad and enter the following program:
<?php
include_once('Client.php');
$worker = new Client();
?>
Save it as billz.php in the /var/www/php/ directory. Next, enter and save the following class as Client.php using Leafpad:
<?php
class Client
{
    function __construct()
    {
        echo "<html><body>";
        echo '<h2>Welcome to OOP PHP,<br/>Raspberry Pi developers!</h2>';
 echo "<img src= 'billGreg.png'>";
 echo "</body></html>";
    }
 
}
?>
Finally, place a graphic—png, gif or jpg—on a USB drive, and plug the drive into your Raspberry Pi USB port or hub. Using the File Manager, copy and paste the graphic into the php directory along with the billz.php and Client.php files. You’re all set to test it. Your file window should look like Figure 4:
Figure 4: PHP files in www/php/ directory

As you can see, it looks pretty much like what you will see in a Windows or Macintosh directory system. Open your Raspberry Pi browser, and in the URL window enter:
  http://localhost/php/billz.php
Press the Enter key, and you should see your page as shown in Figure 5:
Figure 5: PHP generated content from from a Raspberry Pi server.

If you have an internet connection, you can access your Raspberry Pi from another computer either on your LAN or over the internet. I just use my Local Area Network (LAN). Using the terminal command,
  sudo ip addr show
find your IP address. For my LAN, it was 192.168.1.84. Using the URL:
  http://192.168.1.84/php/billz.php
on one of my other computers on the LAN, I am able to use my Raspberry Pi as a Web server and a nice development platform for testing PHP files. (For an internet connection, I can highly recommend the Wi-PI wireless adapter. It is about the size of a USB drive and plugs into your Raspberry Pi.)
Big PHP on Little Systems
The origin of the Raspberry Pi is in the educational field with the goal of getting kids interested in computing. Learning Linux cli code and Python coding (Python comes installed) are two important features of that learning process. Now a server-side language, PHP, can also be part of that process of getting people involved in programming.

Raspberry Pi - WEB UI - wiringPi

source: http://wiringpi.com/download-and-install/


Wiring Pi

GPIO Interface library for the Raspberry Pi

Wiring Pi


HomeDownload and Install

Download and Install

WiringPi is maintained under GIT for ease of change tracking, however there is a Plan B if you’re unable to use GIT for whatever reasons (usually your firewall will be blocking you, so do check that first!)
If you do not have GIT installed, then under any of the Debian releases (e.g. Raspbian), you can install it with:
sudo apt-get install git-core
If you get any errors here, make sure your Pi is up to date with the latest versions of Raspbian:
sudo apt-get update
sudo apt-get upgrade
To obtain WiringPi using GIT:
git clone git://git.drogon.net/wiringPi
If you have already used the clone operation for the first time, then
cd wiringPi
git pull origin
Will fetch an updated version then you can re-run the build script below.
To build/install there is a new simplified script:
cd wiringPi
./build
The new build script will compile and install it all for you – it does use the sudo command at one point, so you may wish to inspect the script before running it.

Plan B

Click on this URL: (it should open in a new page)
https://git.drogon.net/?p=wiringPi;a=summary
Then look for the link marked snapshot at the right-hand side. You want to click on the top one.
This will download a tar.gz file with a name like wiringPi-98bcb20.tar.gz. Note that the numbers and letters after wiringPi (98bcb20 in this case) will probably be different – they’re a unique identifier for each release.
You then need to do this to install:
tar xfz wiringPi-98bcb20.tar.gz
cd wiringPi-98bcb20
./build
Note that the actual filename will be different – you will have to check the name and adjust accordingly.

Test wiringPi’s installation

run the gpio command to check the installation:
gpio -v
gpio readall
That should give you some confidence that it’s working OK.
WiringPi is released under the GNU Lesser Public License version 3.

How to Setup Wi-Fi On Your Raspberry Pi via the Command Line

source: http://www.howtogeek.com/167425/how-to-setup-wi-fi-on-your-raspberry-pi-via-the-command-line/

How to Setup Wi-Fi On Your Raspberry Pi via the Command Line


You configured your headless Raspberry Pi just the way you want it, it’s settled in and running smoothly, but suddenly you want to move it away from its Ethernet tether with a Wi-Fi module. Skip hooking it back up to all the peripherals and quickly add in Wi-Fi support from the command line.

Why Do I Want to Do This?

If you’re a Raspberry Pi enthusiast (or quickly becoming one), you know how annoying it can be to realize that your headless Pi project now needs yet another little tweak that likely necessitates hooking up a monitor and keyboard/mouse to the box.
RELATED ARTICLE
The HTG Guide to Getting Started with Raspberry Pi
Over the last year the Raspberry Pi, a cheap credit-card sized computer, has taken the computing and DIY world by... [Read Article]
The best way to avoid falling into that trap is to configure your Raspberry Pi for remote access. Once you have that configured, however, you still need to know how to do tasks remotely that would previously be handled by a GUI interface (like turning on the Wi-Fi). Today we’re going to walk you through the technical (but simple) way to remotely connect to your Pi and activate a Wi-Fi add-on dongle.

What Do I Need?

For this tutorial you’ll need the following items:
  • 1 Raspberry Pi unit with Raspbian installed (this technique should work on other distributions, but we’re using Raspbian)
  • 1 Ethernet connection to Pi unit (necessary for activating the Wi-Fi functionality remotely)
  • 1 Wi-Fi Dongle (we use this model on all our Pi units with great success)
If you don’t use this Wi-Fi dongle model, we strongly recommend researching the model you intend to purchase to see if it is well supported. To that end, the USB Wi-Fi adapter section of the RPi wiki is very helpful.
In addition to the above items, you need to take a moment to check the configuration of the Wi-Fi node you intend to connect your Raspberry Pi unit to: you’ll need to make note of the SSID, password, and encryption type/method (e.g. the node is using WPA with TKIP shared-key encryption).

Enabling the Wi-Fi Dongle via the Terminal

To get started, power up your Raspberry Pi unit without the Wi-Fi dongle attached. At this point, the only network device should be the onboard Ethernet NIC (which you have connected to your network via Ethernet cable so you can remotely access the headless device).
Connect to your Pi via SSH to access a remote terminal prompt. (If you have not yet configured your device for remote access in this fashion, please review the following tutorial).
At the prompt, enter the following command:
sudo nano /etc/network/interfaces
In the nano text editor, you’ll see something like this:
auto lo
iface lo inet loopback
iface eth0 inet dhcp
That’s the very basic configuration that governs your Pi’s Ethernet connect (indicated by the eth0 portion). We need to add on a very minor bit to enable the Wi-Fi dongle. Use the arrow keys to move down below the existing entry and add the following lines:
allow-hotplug wlan0
iface wlan0 inet dhcp
wpa-conf /etc/wpa_supplicant/wpa_supplicant.conf
iface default inet dhcp
Once you’ve annotated the file, press CTRL+X to save the file and exit the nano editor. At the prompt again, enter the following command:
sudo nano /etc/wpa_supplicant/wpa_supplicant.conf
Compare the contents of the file, if it exists, to the following code. If the file is empty, you can use this code to populate it. Take note of the commented lines (indicated by the # marks) to reference which variable you should use based on your current Wi-Fi node configuration.
ctrl_interface=DIR=/var/run/wpa_supplicant GROUP=netdev
update_config=1

network={
ssid="YOURSSID"
psk="YOURPASSWORD"

# Protocol type can be: RSN (for WP2) and WPA (for WPA1)
proto=WPA

# Key management type can be: WPA-PSK or WPA-EAP (Pre-Shared or Enterprise)
key_mgmt=WPA-PSK

# Pairwise can be CCMP or TKIP (for WPA2 or WPA1)
pairwise=TKIP

#Authorization option should be OPEN for both WPA1/WPA2 (in less commonly used are SHARED and LEAP)
auth_alg=OPEN

}
When you’re done editing the file, press CTRL+X to save and exit the document. Now is the time to unplug the Ethernet cable and plug in the Wi-Fi dongle.
At the command prompt, enter the following command:
sudo reboot
When the device finishes rebooting, it should automatically connect to the Wi-Fi node. If for some reason it fails to appear on the network, you can always plug the Ethernet cable back in to double check the two files and the variables you altered.

Turning on an LED with your Raspberry Pi's GPIO Pins

http://thepihut.com/blogs/raspberry-pi-tutorials/27968772-turning-on-an-led-with-your-raspberry-pis-gpio-pins


The Code

You are now ready to write some code to switch the LED on.  Turn on your Pi and open the terminal window.
Create a new text file “LED.py” by typing the following:
nano LED.py
Type in the following code:
import RPi.GPIO as GPIO
import time
GPIO.setmode(GPIO.BCM)
GPIO.setwarnings(False)
GPIO.setup(18,GPIO.OUT)
print "LED on"
GPIO.output(18,GPIO.HIGH)
time.sleep(1)
print "LED off"
GPIO.output(18,GPIO.LOW)
Once you have typed all the code and checked it, save and exit the text editor with “Ctrl + x” then “y” then “enter”.

Running the Code

To run this code type:
sudo python LED.py

Saturday, January 30, 2016

Info Log: 55% of Visitors Spend Fewer Than 15 Seconds on Your Website. Should You Care?

March 14, 2014 // 8:00 AM 

55% of Visitors Spend Fewer Than 15 Seconds on Your Website. Should You Care?

Written by | @
According to data by Tony Haile of Chartbeat, I've only got 15 seconds to capture your attention ... so I guess I better make it quick. His data shows that people aren't reading content on the web the way we think they are, and the whole measurement system might be broken. Instead of tracking article views, we should focus on reading time and page engagement.
As a person who makes a living off of people reading, clicking, and sharing content, I was initially terrified. This couldn't possibly be true -- otherwise everything I know about content is pretty much a lie! To quell my panic, I took a little closer look at the data -- it seemed to be mostly from media companies.
In an email exchange, Chartbeat confirmed my suspicions. "The sample we used for our research is a random sample of the clients for whom we have permission to aggregate and anonymize their data," said Lauryn Bennett, Head of Brand at Chartbeat. "There are blog posts and the like included in the articles but most are traditional news/media posts, as we work with mostly media sites. Also, the term "articles" doesn't include homepages or landing pages; they're the news/content/media posts, pages, stories."
Even though we're all trying to be media companies, there are times where we aren't exact copycats. We have different business models. We have different challenges. We have different goals. We should both be working toward being like each other, but the reality is that we're not there just yet.
So I dug through Chartbeat's data to see what kind of takeaways folks like me who are trying to grow a business through content should know. I'll outline the three most important data points I found in the article and then explain what that data means for anyone trying to use content to grow their business.
At this point, at least a third of you have clicked away from this post -- thanks to those of you sticking around for the good stuff -- so hopefully you'll stick around a little bit longer. The data is captivating, and the insights could make you think about your job a little differently. I hope you read to the end (for both of our sakes).  

Data Point #1: People Engage With Newsworthy Content More Than Evergreen Content

The Chartbeat team looked at a random sample of 2 billion pageviews generated by over a half a million articles on 2,000 sites to see which types of topics got more engagement. In an email exchange, Chartbeat defined engagement as "the amount of time, measured in seconds, that a person is actively interacting with their browser. While a user is reading a page, we count up the amount of time s/he spends with the page in an active browser tab -- a foregrounded tab where the user has scrolled, typed, navigated, or moved their mouse in the last few seconds."
According to the TIME article, "Articles that were clicked on and engaged with tended to be actual news. In August, the best performers were Obamacare, Edward Snowden, Syria and George Zimmerman, while in January the debates around Woody Allen and Richard Sherman dominated." On the flip side, articles with little engagement were those with generic, evergreen topics. "In August, the worst performers included Top, Best, Biggest, Fictional etc. while in January the worst performers included Hairstyles, Positions, Nude and, for some reason, Virginia. That’s data for you."
This was one of those takeaways that knocked me on my feet -- after all, evergreen articles contribute a huge chunk of leads and blog post views every month. But, on a deeper look, it's not all that surprising. If you're just looking at single month snapshots, newsworthy content will definitely be on top -- it's still relevant. But, if I had to take a guess, this trend wouldn't look the same if you looked at a longer period of time.
I'd bet that story traffic and engagement rates spike when it's newsworthy, then plummets when it's "old news." Evergreen content, on the other hand, would be a slow growth (including engagement). I'd speculate that if you measure both types of articles over a year, their average engagement numbers would be strikingly similar. They're two different plays -- one for longterm, sustainable growth, the other for quick splashes of traffic.
Of course, I don't have access to the data, so this could be utter fluff, but the takeaway here should not be to double down on newsworthy content. You're concerned with longterm, sustainable traffic to your site that converts into sustainable growth for your business -- not content that brings you business one month and then trickles off. That being said, if you're looking to reach short-term traffic and lead gen goals, trying to newsjack could help you attain them.

Data Point #2: Social Media Has Little Effect on Reading Engagement

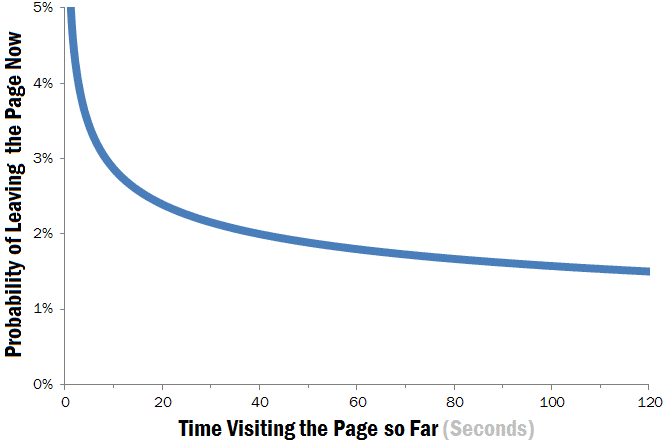
The Chartbeat data on social media's influence on reading engagement was also pretty dire. Out of 10,000 articles shared on social media, they found that there was no relationship whatsoever between the amount a piece of content is shared and the amount of attention an average reader will give that content. The chart below can show you want that means, visually:
chartbeat_read_time_social_sharing
Kinda dismal, right? You'd think that because social media helps businesses get traffic, leads, and customers to people's websites, a majority of those would be engaged visitors.
So maybe you refocus your social efforts to engage only the most avid readers -- if you're a HubSpot customer using Social Inbox, you can get a better idea of who you're talking to and where you're spending your time. Maybe you find that leads are those who consume the most content, so you choose to spend more time sending them articles.  
Or maybe you can think about the larger picture. People who come through social media to your site most likely stumble on the link randomly and something specific piques their interest. They passively found your link, so it's no wonder that they might not be your most engaged reader.
On the other hand, people who find your content through search engines are in active search mode already -- they're looking for a specific answer and are committed to taking the time to find it, which may make them more engaged visitors. If that's the metric you're trying to move on your content, you should focus on more SEO optimization. This data doesn't mean all social is hopeless -- it just means you might have to rethink how you're using those platforms and maybe reallocate your time to other marketing activities.

Data Point #3: Banner Ads Don't Work

Chartbeat just comes out and says it: Banner ads are on the outs. "Click-through rates are now averaging less than 0.1% and you’ll hear the words banner blindness thrown about with abandon," Haile says in TIME.
But Haile offers a solution. Since 66% of attention on a normal media page is spent below the fold, and people spending at least 20 seconds on a page with an ad are 20-30% more likely to recall that ad afterwards, advertisers should just focus on placing their ads in places people look, and on getting them to look at the ads for a while.
He's not suggesting that advertising be kicked in the pants, just that advertisers should use metrics like time and attention instead of views and clicks. And by focusing on new metrics, advertisers can get better ROI and media sites can focus on what really matters: creating quality content that gets people to stick around.
So what do these recommendations actually mean for your business? Spend more money on advertising to get better marketing ROI? Not quite.
First, I'd argue that switching up the placement of ads won't impact reader behavior in the long run. That "banner blindness" thing is actually a studied phenomenon. According to user testingby the Nielsen Norman Group, no matter what the engagement level, people ignore banner ads. They say, "If users are looking for a quick fact, they want to get done and aren't diverted by banners; and if users are engrossed in a story, they're not going to look away from the content." Which brings me to my next point -- if the solution is to create quality, engaging content, banner ads could be even less effective.
Instead of buying up ads, just focus on creating your own quality content. Be the content on the page that keeps people engaged -- not the ad on the side that's either interrupting an experience or getting ignored. Get the pageviews on your site instead of renting out others'.
At the end of the day these stats give us a fascinating look into the media world -- the folks we're all trying to model our content after. We shouldn't take every piece of data with a grain of salt, but with a little digging and extra analysis, we can walk away with some tangible takeaways for our business.

Info Log: How Long Do Users Stay on Web Pages?

source: https://www.nngroup.com/articles/how-long-do-users-stay-on-web-pages/


How Long Do Users Stay on Web Pages?

by JAKOB NIELSEN on September 12, 2011
Summary: Users often leave Web pages in 10-20 seconds, but pages with a clear value proposition can hold people's attention for much longer because visit-durations follow a negative Weibull distribution.

Sunday, January 24, 2016

MOOCs and e-learning for higher education in developing countries: the case of Tajikistan

MOOCs and e-learning for higher education in developing countries: the case of Tajikistan


There has been a lot of talk and research on massive open online courses (MOOCs) and their potential impact, but is it really applicable to developing countries? How can universities take advantage of online content? And what kind of regulations and quality assurance mechanisms do we need?

Last year, as a part of the “Tajikistan: Higher Education Sector Study,” I led a team to conduct pilot activities to assess the feasibility of using MOOCs and other e-learning content in higher education institutions (HEIs) in Tajikistan.

Recently the Government of Tajikistan has decided to discontinue existing correspondence-based programs for part-time students and shift to a “distance learning” system using computers and Internet technology. Thus, this study was conducted to assess the possibility of using information and communication technologies (ICT) to improve access, quality and relevance of higher education in Tajikistan. In addition, the study supported a mini-project to pilot a number of ICT-based solution models to tackle challenges identified in the country’s National Education Development Strategy.

Recently, we interviewed pilot participants about their experience participating in MOOCs, e-learning and distance education, and then produced a series of short video clips. These videos showcase the impact of potential use of online learning and distance education for improving access, quality and relevance of education as well as reduction of the gender gap. One of the female students in the video mentioned that distance education allows her to continue studying after having kids.

Here is the overview video that we produced:
 
ICT for Higher Education? The Case of Tajikistan


The pilot project included teacher training on course creation using an open-source learning management system called Moodle and ATutor; the use of existing courses from different online platforms such as Coursera, Code AcademyLingualeo and Intuit.ru for teacher training, life-long learning and supplementary learning materials; a survey aimed at the private sector on joint course creation with universities; and workshops to raise awareness and conduct knowledge exchanges with open universities from Malaysia, Indonesia, South Africa and the United States on distance education and the use of learning management systems.

These pilot activities were developed to answer the following five key research questions:
  1. Is there a capacity and infrastructure to develop online courses for teacher education in higher-education institutions (HEIs)?
  2. Can students and teachers take online courses using current Internet connections?
  3. Is the private sector interested in collaborating with universities to make online courses and hiring students who took the courses?
  4. Can online courses be included as a part of the curriculum?
  5. How can we better use the National Research and Education Network and Learning Management System?
While these pilot activities were conducted on a voluntary basis, three universities and two non-governmental organizations (NGOs) participated to take part in this experiment. Our team is grateful for their eagerness to learn, commitment and willingness to share experiences amongst each other. The series of workshops also created stronger ties among higher education institutions. 

The results of the pilot showed:
  • Capacity and infrastructure to create online courses exist, but most of the courses are IT-related and more non-IT courses will be needed.
  • Language is a barrier for using existing online courses; therefore, students and teachers preferred Russian-based online course materials such as Intuit.ru, which is run by the National Open University in Russia (see Figure 1, below). Thirty-nine percent of participants took courses in English, 43 percent in Russian and 17 percent in Tajik.
  • Students are more motivated to take online courses when a recognized certificate is issued.
  • According to teachers who participated in the pilot, the top three requirements for e-course development are: human capacitytraining materials and financial resources.
  • The top three advantages for e-learning, according to teachers and students are: self-learning opportunitiesavailability of professional development through life-long learning, and potential reduction of the urban-rural gap.
  • The top three disadvantages for e-learning, according to teachers and students are: lack of skills and inability to use new technologieslow motivation of trainees for self-learning and low-quality assurance of educational contents
  • The private sector is willing to create courses with universities, invest in training development and interested in hiring those who finish these courses.
  • Including online courses in the curriculum is still challenging due to accreditation issues.
  • The Tajik Academician Research and Educational Networks Association (TARENA) has the potential to provide more research- and education-related services to HEIs in collaboration with regional research and education networks. 


These findings echo what was discussed during the “MOOCs for Development” conference, held in April 2014 at the University of Pennsylvania. The main discussion about the limitation of the MOOCs was that people do need to have prerequisite skills such as English, literacy and pre-knowledge about the subjects, as well as sufficient broadband connectivity to leverage these resources. Also, when we introduce MOOCs or Open Education Resources (OER), we need to think beyond online content – a new education eco-system such as OER University, which applies open innovation in every aspect of education system from quality assurance to contents provision.

We also have to think about the role of teachers and the new pedagogical approach. And finally, contextualization of the materials is a must.  Through the conference, various knowledge exchanges and analysis of the international experience on the use of MOOCs and e-learning in higher education, we have learned the following:
  • Policy: It is essential to set up a quality assurance mechanism for distance education to assure its quality. Not all the courses should be in distance education format. A phase approach for building online educational resources is key.
  • Course delivery: Distance education is often delivered in a blended mode (online, CD-ROM, via TV, and face to face) where the role of tutor is essential.
  • Course creation: In-house development or outsourcing approaches are taken. Use of creative commons license is getting popularity for content creation. Using MOOCs from foreign universities are restricted. Localization of content leveraging existing OER is important.
  • Role of teacher: Teachers generally become facilitators of education rather than lecturers.In Tajikistan, this pilot helped HEIs and the Ministries of Education and Science think through the operationalization of MOOCs and e-learning contents in a holistic manner.
After the pilot, I went to Tajikistan and held workshops with the participants of the pilot to discuss what we can do to develop an enabling environment for the distance education from the infrastructure, policy, content creation and capacity development perspectives.

Currently, the higher education project is in preparation and lessons learned from this pilot initiative are being incorporated. I will report back on the progress we discover.

Learning MS Power APP and FLOW

https://powerapps.microsoft.com/ro-ro/blog/microsoft-powerapps-learning-resources/